Tuesday, February 7, 2012

Painting tip....

I have had this brown paint chip taped to the wall above my bed for like 2 years...
Seriously!!

I just could not make up my mind. 
Due to cabin fever or spring fever 
or sheer madness.

I just bought the stinking paint and did it...
I was only doing the wall behind my bed.
Which meant that I needed to tape a line.
I have heard a million things like buy the "Frog tape" and buy the most expensive angled brush...
But I am cheap...
I remembered reading somewhere about taping and then using Mod Podge to help seal it.

So I taped....
(with my cheap tape)

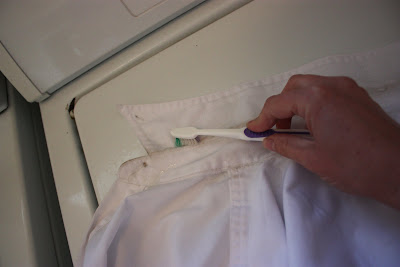
 I Mod Podged down the edge of the tape...

And let it dry....
(and crossed my fingers that it worked)


Painted and waited...
(while my fingers were still crossed) 

And it worked!!

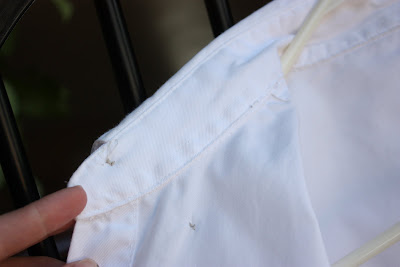
It left a pretty darn straight line...
With only a few tiny spots that may need to be touched up!

And now I am working on a gallery wall for my room, new ruffly "anthro" inspired curtains, and accent pillows!!
Pin It

Wednesday, February 1, 2012

Funky Frame


How fun are these FuNkY FrAmEs??

My sister made me the cutest sign for my wall in one of these frames for Christmas...
so I had to copy her and make another one for our
latest family pictures. 

I started with a large piece of newspaper.....and traced the outside of a picture frame onto it.  That was my guide for the size I needed the outside of the frame to be.

Next was the hardest part for me....drawing out my design. 
 I am so not an artist. 
So I cheated. 
I folded the newspaper into fourths using the traced frame as my guide....and just drew one corner of the design.  Then I cut it out...and when I unfolded it whalaaaaa. Totally symetrical.  

Then, using the newspaper as my template, I traced the design onto a big piece of thin plywood. 

(If you want your frame stacked like mine is...you will need to do this again, making another frame about an inch bigger all the way around.) 
Ok, now get out your power tools.... 
 and get cutting.

{We used a jig saw}

For the center of your frames, you will need to trace the inside of the picture frame you are using to get the
right size for your inside cuts. 

Now the fun part....paint!

After everything is dry, use wood glue to stack your frames. 
{Make sure your inside edges are aligned so that
your picture will fit into it right.} 

Then adhere the actual frame to the top, and insert your glass.


There are SoOoOoO many ways you could do these.....varying the frame design and paint colors!

Get creative!


                                                 ~Mindy

Tuesday, January 31, 2012

An "easy" wreath...

I say easy...
And I mean easy because you only need 3, scratch that, 4 things!

1st is some crepe paper.  
I bought mine at JJWD for only $1.19 for 2 rolls.
I used 3 rolls.


2nd  is a piece of cardboard 
Cut into the shape of a heart. 
It doesn't need to be scientific.  Your flowers will hide any imperfections!

3rd thing is A LOT of glue sticks.
I bought mine at JJWD.
You get 20 for $1.00!!  
So buy extra...you will need them!


I wrapped my heart with crepe paper.  ( just so you couldn't see the brown cardboard)


Next is the fun part (not really)
Cut strips of paper.  Wrinkle them up. Unfold them. Fold over one edge. And start wrapping and gluing.
I found the instructions and Tutorial is here!
Much more detailed than I just gave you!


Be prepared to burn your fingers a time or two!!


The 4th thing you need is some DVR'ed entertainment.
I had 4 episodes of Tori and Dean.


It took a little longer than I thought...
But it was worth it!
I loved how it turned out!!


Pin It

Tuesday, January 24, 2012

I {heart} Dawn...

I have shared this on my other blog...
but for new readers this is a tip worth sharing again!!

I swear by Dawn!!
My mother-in-law told me to try it to remove grease from a rug.
And it worked,
like a charm.
So, after I had my 1st baby and we had our 1st yellow baby poo blowout.
I tried it on those tiny pink pj's...
and it took that yellow stain right out!
And now I use it for everything!!
My Husband has to wear a white shirt everyday to work!
(which he hates...and I do to because white gets SO dirty!!)

I have made my own "Dawn and Wash"

Here is what I do to get rid of that
yucky ring around the collar...
And other dirty areas...

Dawn (you can use any of them I have tried them all)
a Dollar Store spray bottle
my old toothbrush
(because someone gave it to the baby, who ended up sharing it with the dog)
I mix 2 tablespoons of Dawn to a little more than half of the bottle with water.
Give it a little shake and that is all!
1st Spray with Dawn and water mixture...

and scrub with your toothbrush...
and Ta Da....
It really works!!
And I use it on EVERYTHING!!
Punch stains, oil stains, grease stains,
a bad accident involving chocolate milk and carpets,
and it even has taken out set in stains on my favorite t-shirt!
It's a pretty cheap alternative to spray and wash and other stain removers.
I think it works better than most of those other stain removers!!


Pin It

Thursday, January 19, 2012

The Best Pot Roast....EVER!

I live in a small town.  Like really small.  
But I LOVE it!
There are so many reasons why I love it...
I could list them all for you,
but I won't.
But I am going to give you one of my favorite reasons.
My local grocery store.
Its called Barretts.
I LOVE that they know me...
We were looking to make a Roast for Sunday Dinner, 
 We were standing at the meat counter, trying to decided what to get. 
Dave, the best meat counter guy, told us about this recipe. 
And it is 
SO GOOD, SO EASY, and SO TENDER!!
You'll need:
McCormicks slower cooker Savory Pot Roast season packet
An Au Jus packet
A Can of Pepsi (we use Coke because we always have coke in our house)
And Boneless Cross Rib Roast
and your crock pot

   Put your Roast in the crock pot. 
Mix the Slow cooker seasoning with 1 cup of Water.
Pour on top of roast.
      Add the whole can of Coke.
Cover with your lid for 8 Low or 4 hours on high.
Its VERY important that you never lift the lid!

Right before you are ready to pull it out, 
sprinkle your dry Au Jus packet over the roast.


Ahh.....
Pull it out and slice it up!
I promise you it is the most tender Roast EVER!!

ENJOY!!

Tuesday, January 17, 2012

A five mintue Valentine craft...

I needed a little something to add to my valentines decor...
I had bought some red, hot pink, and pink felt at JJWD.
(my local hardware store)

They were 3 pieces for $1.00!
Yay!!

I cut little hearts out in all shapes and sizes...
Threaded my machine with red thread.
And just sewed them in a line.
You could easy do this with just a thread and a needle!


So easy!
So easy that I made 3 more to add in 
different places all over my house!
And it added the touch that I was looking for.
Pin It

Tuesday, January 10, 2012

It's a New Year...

You know what the New Year brings?
 That thing we all do.
You know...
 The resolution thing. 
 Do you do it well??
Well I don't.  I never have. 
 I came to the conclusion that I never will.

With that being said...
A New Year always brings the desire to organize out in me. 
Mindy and I are going to do a little series this month about organizing different spaces in your home.
I have started and it becomes additcting. 

We are going to share ideas with you.  If you have an idea to share, let us know! 
 We are all here to help each other.

During Christmas break, my baby would not leave my cleaning supplies alone. 
Maybe it was because they are in every room, under every sink.

My soulution...
an $8.98 shoe organizer from Walmart.
Hung on the back of my Laundry Room door.
Where NO little monsters can see it!!


A great space for everything!!

Monday, January 9, 2012

We are back....

After barley surviving the holidays
We are back with an organizing challenge, new crafts,
yummy recipes, and Valentines DIY projects!!

I just got my tree down!
Seriously!

And now I am depressed. 
My house is sad and no longer sparkly!

I went straight for decorating for Valentines Day!

Yesterday we decided to make something to spruce up our Living Room area.

 See....Kinda sad!!


Looking for some inspiration....


My cute hubby measuring my space...
while I boss him around!


 A plan....


Wood salvaged from my broken fence in the backyard...

 Cut and layed out to decide where to add the screws.


Cute....


After I screwed it all together.
  I decided it needed a little paint.
 Watered down white did the trick. 


I hung a wreath that I had in another room on it.
And then decided it needed a valentines touch!
That will come next!

I LOVE it!!